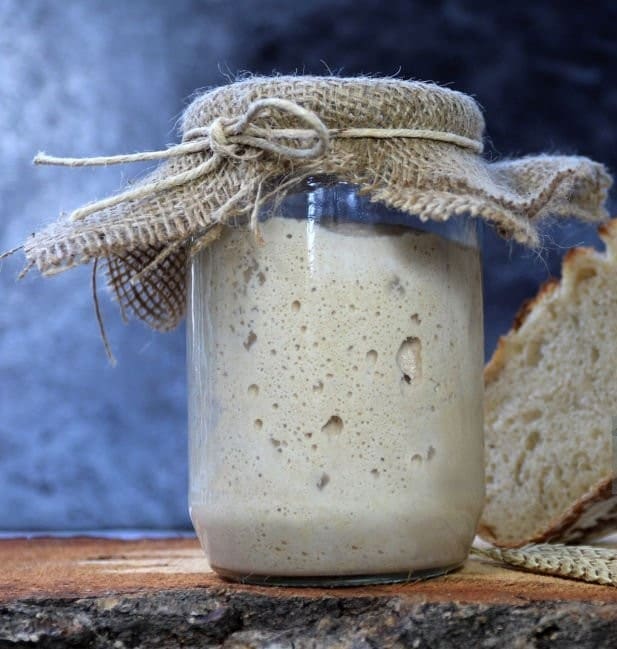
If you’ve ever scrolled through photos of beautiful artisan loaves and thought, I’d love to make sourdough, but it seems way too complicated, you’re not alone. That’s why I made this Simple Guide to Starting and Maintaining a Sourdough Starter.
Thank you for reading this post, don't forget to subscribe!When I first started baking sourdough, I was overwhelmed by all the terminology, schedules, hydration percentages, and conflicting advice online. I almost convinced myself that sourdough was only for experienced bakers.
Thankfully, I was wrong.
At its core, sourdough is simply flour, water, and time.
Once you understand the basics, maintaining a healthy starter becomes a simple rhythm that naturally fits into everyday life. Whether your goal is baking sandwich bread for your family or creating rustic artisan loaves, everything begins with a healthy starter. That’s why we need a Simple Guide to Starting and Maintaining a Sourdough Starter!
In this guide, I’ll walk you through exactly how to start and maintain a sourdough starter, along with the lessons I wish someone had shared with me when I was beginning.
What Is a Sourdough Starter and why do we need a Simple Guide to Starting and Maintaining a Sourdough Starter
A sourdough starter is a living culture made from flour and water.
Natural wild yeast and beneficial bacteria from the environment begin feeding on the flour, creating fermentation. This process develops the natural leavening that allows sourdough bread to rise without commercial yeast.
Think of your starter as a tiny ecosystem living in a jar.
When cared for consistently, it can last for years and even decades.
Many bakers pass their starters down through multiple generations.
What You’ll Need for this Simple Guide to Starting and Maintaining a Sourdough Starter
One of the things I love most about sourdough is how simple it is.
To make a starter, you’ll need:
- A glass jar or container
- Flour
- Water
- A spoon or spatula
- Patience
That’s it.
You don’t need expensive equipment or specialized tools to get started.
Choosing Flour
For beginners, I recommend starting with:
- Unbleached all-purpose flour
- Whole wheat flour
Whole wheat flour often helps initiate fermentation because it contains more natural nutrients and wild yeast.
You can use a combination of both during the first week.
Choosing Water
If possible, use filtered water.
Some municipal water systems contain chlorine, which can slow fermentation.
Don’t stress about this too much, though. Many successful bakers use ordinary tap water without issues.
Watch this video on YouTube that guides you through a Simple Guide to Starting and Maintaining a Sourdough Starter
How to Start a Sourdough Starter
Day 1
In a clean jar, combine:
- ½ cup flour
- ¼ cup water
Stir until there are no dry spots.
The mixture should resemble thick pancake batter.
Cover loosely and place it in a warm area of your kitchen.
Day 2
You may or may not notice changes.
This is completely normal.
Add:
- ½ cup flour
- ¼ cup water
Stir well.
Days 3-5
This is often when new bakers become confused.
You may notice:
- Bubbles
- A sour smell
- Increased activity
Then suddenly, everything seems to stop.
Don’t panic.
This is a normal stage of starter development.
Continue feeding daily.
Days 6-7
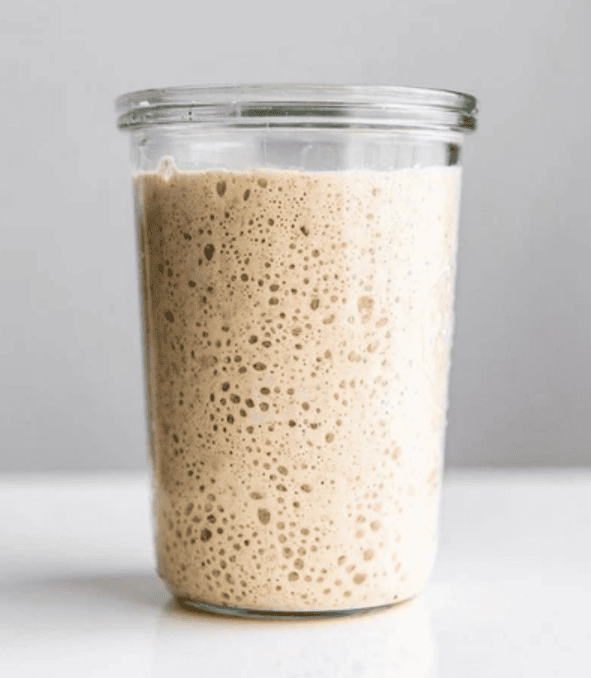
By the end of the week, you should see more consistent bubbling and rising.
Some starters become active quickly.
Others need additional time.
Both are perfectly normal.
How to Know When Your Starter Is Ready
A healthy starter should:
✅ Double in size after feeding
✅ Contain bubbles throughout
✅ Smell pleasantly tangy
✅ Consistently rise and fall
One simple test is the rise test.
Feed your starter and mark the level on the jar.
If it doubles within several hours, it’s becoming strong enough for baking.
Remember: strength is more important than age.
A ten-day-old starter can be healthier than a month-old starter that hasn’t been fed consistently.
Common Beginner Mistakes
1. Giving Up Too Soon
This is probably the biggest mistake.
Many people expect immediate results.
Sourdough teaches patience.
Some starters develop quickly. Others need extra time.
Keep feeding it consistently.
2. Obsessing Over Perfection
At first I thought every feeding needed to happen at exactly the same minute every day.
The reality is that sourdough is more forgiving than most people think.
Consistency matters more than perfection.
3. Ignoring Temperature
Temperature affects fermentation more than almost anything else.
If your kitchen is cool, your starter may seem sluggish.
If your kitchen is warm, activity will increase significantly.
Before assuming your starter isn’t working, consider the environment.
4. Using Too Large of a Jar
Starters can rise dramatically when active.
Choose a container large enough to allow plenty of room for growth.
5. Constantly Switching Methods
One day feeding with whole wheat.
The next day changing flours.
Then following three different tutorials.
Pick one approach and stay consistent for at least a week or two.
Consistency creates clearer results.
How to Maintain Your Starter
Once your starter becomes active, maintenance is surprisingly simple.
If You Bake Frequently
Keep your starter on the counter.
Feed it daily.
A daily feeding rhythm works well for people who bake several times per week.
If You Bake Occasionally
Store your starter in the refrigerator.
Many home bakers only bake once per week.
In that case:
- Place the starter in the refrigerator
- Feed it about once weekly
- Refresh it before baking
This approach dramatically reduces maintenance while keeping your starter healthy.
My Simple Weekly Routine that makes this Simple Guide to Starting and Maintaining a Sourdough Starter so easy to follow.
My sourdough rhythm is intentionally simple.
A few days before baking:
- Remove starter from refrigerator.
- Feed it.
- Allow it to become active.
- Use what I need for baking.
- Feed the remaining starter.
- Return it to the refrigerator.
That’s it.
No complicated schedules.
No stress.
Just a simple routine that fits naturally into family life.
Simple Guide to Starting and Maintaining a Sourdough Starter-Frequently Asked Questions
Why does my starter smell strange?
During the first week, odors can vary significantly.
Tangy, sour, fruity, or slightly yeasty smells are usually normal.
Why isn’t my starter bubbling?
Temperature is often the culprit.
Try moving the jar to a warmer location and continue feeding consistently.
Can I miss a feeding?
Yes.
Your starter isn’t ruined because you forgot once.
Simply resume feeding and give it time to recover.
What is sourdough discard?
Discard is the portion removed before feeding.
Instead of throwing it away, many bakers use it for:
- Pancakes
- Muffins
- Crackers
- Cookies
- Pizza dough
Using discard helps reduce waste while providing delicious recipes.
Final Thoughts
Starting sourdough can feel intimidating at first, but it doesn’t have to be complicated.
Remember that every experienced baker once stared at a jar of flour and water wondering if they were doing it correctly.
The secret isn’t perfection.
The secret is consistency.
Feed your starter. Be patient. Learn as you go.
Some loaves won’t turn out exactly how you imagined.
Some will surprise you.
Every bake teaches something valuable, and before long, maintaining your starter becomes just another peaceful rhythm in your homemaking routine.
If you’re just beginning your sourdough journey, don’t let fear of failure stop you. The best way to learn is simply to start.
Have you started a sourdough starter yet? Let me know your biggest sourdough question or challenge in the comments below.